

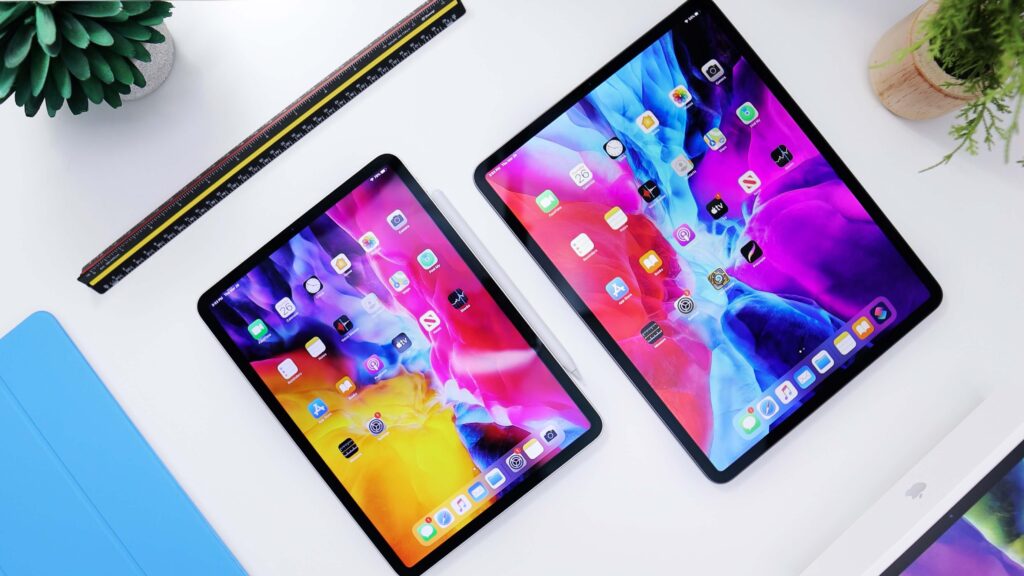
Setting Up Your New Tablet for the First Time can be an exciting and slightly overwhelming experience. However, with a step-by-step guide, the process becomes much simpler and more manageable. This tutorial will walk you through the essential steps to get your new tablet up and running smoothly. From unboxing and initial setup to adjusting key settings, installing apps and updates, transferring data, and exploring additional features, we’ve got you covered.
First, let’s start with unboxing and the initial setup process, which includes unpacking the tablet, charging it, powering it on, and selecting the language. Then, we’ll move on to connecting the tablet to Wi-Fi to ensure a stable internet connection.
Next, we’ll guide you through creating a new account or signing in with an existing account, allowing you to access personalized settings and sync your data across devices. We’ll also address key settings such as date and time, wallpaper and themes, and sound and volume, enabling you to customize your tablet to your preferences.
Once the basic settings are in place, we’ll walk you through the process of installing essential apps and updates. This involves accessing the app store and downloading/updating apps to enhance your tablet’s functionality.
To ensure a smooth transition from your old device, we’ll demonstrate how to transfer data and sync your email and social media accounts to your new tablet. In addition, we’ll guide you in securing your tablet by setting up a screen lock, enabling passwords, and considering two-factor authentication for enhanced protection.
Furthermore, we’ll help you explore additional tablet features such as using the camera and gallery, navigating the home screen and app drawer, and customizing widgets and shortcuts.
Lastly, we’ll provide tips for optimizing tablet performance, including managing storage, clearing cache, and ensuring regular updates of the operating system and security patches.
With this comprehensive tutorial, you’ll have all the necessary information and guidance to set up your new tablet and make the most out of its functionalities. Let’s dive in!
Table of Contents
Key takeaways:
- Unboxing and initial setup: Taking the time to properly unbox and set up your new tablet is essential for ensuring a smooth and enjoyable user experience.
- Customizing settings and personalizing your tablet: Adjusting key settings such as date, time, wallpaper, and sound can enhance your tablet experience and make it feel more personalized.
- Securing your tablet and optimizing performance: Setting up screen lock, enabling two-factor authentication, and managing storage are important steps to protect your tablet and ensure optimum performance.
Unboxing and Initial Setup
Get ready to embark on a tech adventure as we dive into the world of unboxing and setting up your brand-new tablet! From unpacking the sleek package to selecting your preferred language, charging up the device, and connecting to Wi-Fi, we’ve got you covered. So grab your tablet, follow along with this user-friendly guide, and get ready to unlock the full potential of your new gadget.
1. Unpacking the Tablet
When unpacking your new tablet, there are several steps to follow to ensure a smooth setup process.
| 1. Unpacking the Tablet |
| Remove your tablet from its packaging and carefully unwrap any protective materials. |
| Inspect the tablet for any visible damage or defects. |
| Gather all the accessories that came with the tablet, such as the charging cable and adapter. |
| Place the tablet on a clean and flat surface, ready for the next steps of the setup process. |
2. Charging the Tablet
To ensure a smooth setup of your new tablet and for charging the tablet, please follow these steps:
- Connect the charger: Locate the charger and connect it to the tablet’s charging port.
- Plug into a power source: Plug the charger into a wall outlet or USB port on a computer.
- Wait for full charge: Allow the tablet to charge until it reaches 100%. This may take a couple of hours, depending on the device.
- Check the battery icon: Once fully charged, you should see a battery icon on the screen indicating the battery level is at 100%.
- Unplug and use: Once charged, unplug the charger from the tablet and you’re ready to start using it.
Pro-tip: It’s advisable to avoid using your tablet while it’s charging to prevent overheating and ensure faster charging times.
3. Powering On and Language Selection
To power on your new tablet and select the language, follow these steps:
- Power on your tablet by locating and pressing the power button until the device turns on.
- After the tablet is powered on, a language selection screen will appear. Navigate through the available languages using the touchscreen or volume buttons.
- Tap on or highlight your preferred language and press the power button to select it.
- If necessary, follow any additional on-screen prompts to confirm your language selection.
By following these steps, you will successfully power on your new tablet and choose the desired language.
4. Connecting to Wi-Fi
To successfully connect your new tablet to Wi-Fi, follow these steps:
- Power on your tablet and navigate to the settings.
- Locate the “Wi-Fi” or “Network” option and give it a tap.
- Activate the Wi-Fi function by toggling the Wi-Fi button.
- You will see a variety of available Wi-Fi networks – choose the one you wish to connect to.
- If the network requires a password, simply enter it.
- Tap on the “Connect” option and patiently wait for your tablet to establish a connection.
- Congratulations! Your tablet is now connected to Wi-Fi and you can freely browse the internet or download apps.
By following these steps, you can ensure a seamless connection to Wi-Fi, enabling you to make the most of all the online features and services your tablet has to offer.
Creating or Signing in to Your Account
When setting up your new tablet, one of the crucial steps is creating or signing in to your account. In this section, we’ll guide you through the process, step by step. Whether you’re creating a brand new account or signing in with an existing one, we’ve got you covered.
Get ready to effortlessly navigate through the account setup, ensuring a seamless experience with your new device. Let’s dive in and get started on this exciting journey!
Read More – Tutorial: Enhancing Your Reading Experience on Tablets – 5 Critical Advice
1. Creating a New Account
- To create a new account for your tablet, start by selecting the “Create Account” option from the setup menu on your tablet.
- Enter the required information, including your name, email address, and password.
- Make sure to agree to the terms and conditions of the account.
- Once you’ve provided the information, you will receive a verification link in your inbox. Click on it to verify your email address.
- For added security, you can set up additional measures like two-factor authentication to protect your account.
After successfully creating your account, you will be able to enjoy various features and services on your tablet. This includes downloading apps, syncing data, and customizing settings.
2. Signing in with an Existing Account
- To sign in with an existing account on your new tablet, begin by powering on the device and selecting your preferred language.
- Next, connect your tablet to a Wi-Fi network in order to access the internet.
- Once connected, navigate to the tablet’s home screen where you can locate the “Sign In” or “Log In” option.
- Click on the option and proceed to enter the username or email address associated with your existing account.
- Enter the password for your account.
- Finally, click on the “Sign In” or “Log In” button to successfully access your account.
Make sure you have a stable internet connection for a successful sign-in. If you have forgotten your password, you can utilize the “Forgot Password” option to reset it. Double-check that you are entering the correct username or email address associated with your existing account. If you have multiple accounts, choose the appropriate one to sign in. Once you have successfully signed in, feel free to explore the tablet’s features and customize the settings to your preference.
Related Article – How to Activate Your Android Tablet
Adjusting Key Settings
Get your new tablet up and running smoothly with this tutorial section on adjusting key settings. We’ll cover everything from setting the date and time to personalizing wallpaper and themes, and even managing sound and volume.
So, whether you’re a stickler for punctuality, love to make your device uniquely yours, or crave the perfect audio experience, we’ve got you covered in this section. Time to make your new tablet truly yours!
1. Setting Date and Time
- To set the date and time on your new tablet, start by unlocking your tablet and navigating to the Settings menu.
- Scroll down in the Settings menu and tap on either “Date & Time” or “System,” depending on your device.
- In the Date & Time settings, you will find an option to toggle on the “Set automatically” feature. This will allow your tablet to automatically update the date and time based on your current location and network.
- If you prefer to set the date and time manually, simply toggle off the “Set automatically” option. Then, tap on either “Set date” or “Set time” to input your desired values using the provided date and time selectors.
- After setting the date and time, you can exit the settings menu by tapping either the back arrow or the home button.
Remember to periodically check your date and time settings to ensure accuracy, particularly when traveling across different time zones or during daylight saving time changes.
2. Personalizing Wallpaper and Themes
To personalize the wallpaper and themes on your new tablet, simply follow these steps:
- Go to the display settings on your tablet.
- Look for the option to customize wallpaper or themes.
- Take your pick from a variety of pre-installed wallpapers or themes.
- If you prefer, you can also use your own photos or images as wallpaper.
- Personalize the appearance of icons and widgets on your home screen.
- Tweak the color scheme, font style, and other visual elements to your liking.
Furthermore, here’s an interesting anecdote about the history of personalizing wallpaper and themes. In the early days of computers, users were limited to a few default wallpaper choices. As technology progressed, customization options expanded, giving users a wide range of images and themes to choose from.
This development is a testament to the growing emphasis on user experience and personalization in the digital realm.
3. Managing Sound and Volume
When it comes to enhancing your tablet experience, managing sound and volume is crucial. Here are a few helpful tips:
- Adjusting volume levels: To control the sound on your tablet, simply use the volume buttons located on the side. If needed, you can also fine-tune the volume from the settings menu.
- Customizing sound settings: Dive into the sound settings menu to personalize your audio experience. This allows you to modify settings like the equalizer, sound mode, and even notifications.
- Utilize headphones: For private listening, connect headphones or earphones to your tablet. Whether you’re in a crowded place or looking to immerse yourself in music or movies, this option is incredibly useful.
- Manage notifications: Take charge of the volume and types of notifications you receive by adjusting the notification settings. Choose to mute specific apps or customize your notification tones according to your preference.
By following these practical tips, you’ll effortlessly handle the sound and volume on your tablet, making it perfectly suit your preferences and enhancing the overall tablet experience.
Installing Essential Apps and Updates
Discover the essential steps for setting up your new tablet in no time! In this section, we’ll dive into the process of installing crucial apps and updates. Learn how to access the App Store effortlessly and unlock a world of possibilities at your fingertips.
Plus, we’ll guide you through the seamless process of downloading and updating apps, ensuring that your tablet is equipped with the latest features and functionalities. Get ready to optimize your tablet experience like a pro!
1. Accessing the App Store
- To access the app store on your new tablet, start by unlocking it and navigating to the home screen.
- Once you are on the home screen, search for the app store icon, which is often labeled as “Play Store” if you have an Android device or “App Store” if you are using an Apple device.
- Tap on the app store icon to open it and gain access to the store.
- If prompted, sign in with your Google or Apple ID to proceed.
- Once you are inside the app store, you can either use the search bar to look for specific apps or explore different categories to find new and exciting applications.
- Whenever you come across an app you wish to install, simply tap on it to view more details and then click on either the “Install” or “Get” button.
- Allow the app to download and install on your tablet by patiently waiting for the process to complete.
- Once the installation is finished, you can easily access the app either from your home screen or app drawer.
Remember, don’t hesitate to explore the app store in order to discover useful and entertaining applications that will enhance your tablet experience.
2. Downloading and Updating Apps
Downloading and updating apps on your new tablet is an essential step to personalize your device and access the latest features and functionalities.
- To download and update apps, follow these easy steps:
- Access the App Store: Open the App Store on your tablet by tapping on the respective icon on the home screen.
- Search and Select Apps: Use the search function to find the apps you want to download and update. Once you find the desired app, tap on it to open the app page.
- Download the App: On the app page, tap on the “Install” or “Get” button to start the download process. Wait for the app to download and install on your tablet.
- Update Apps: To update apps, go to the “Updates” tab in the App Store. If any updates are available, you will see a list of apps that need updating. Tap on the “Update” button next to each app you want to update.
Pro-tip: Enable automatic app updates in your device settings to ensure that all your apps stay up to date without manual intervention.
Transferring Data and Syncing Accounts
Looking to seamlessly transition to your new tablet? In this section, we’ll unravel the magic of transferring data effortlessly from an old device, ensuring you don’t miss a beat. But that’s not all! We’ll also dive into the world of syncing email and social media accounts, making sure you stay connected to your digital realm without a hitch.
Say goodbye to tech-related headaches as we guide you through each step to master the art of data transfer and account synchronization.
1. Transferring Data from an Old Device
- To transfer data from an old device to a new tablet, begin by backing up your data to a computer or cloud storage.
- Next, connect the new tablet to the computer using a USB cable.
- After that, choose the specific data you wish to transfer, including contacts, photos, and documents.
- Then, copy the selected data from the computer and paste it into the appropriate folders on the tablet.
- If you are utilizing cloud storage, make sure to install the relevant apps on both devices and sign in to access the stored data.
- Lastly, confirm that the transferred data is properly organized and readily accessible on your new tablet.
2. Syncing Email and Social Media Accounts
- Open the settings menu on your tablet.
- Select “Accounts” or “Cloud and Accounts” to start syncing email and social media accounts.
- Tap on “Add Account” and choose the type of account you want to sync, such as email or social media.
- Enter your account credentials, including your email address and password.
- Follow the prompts provided to complete the setup process for syncing email and social media accounts.
- Repeat these steps for each email or social media account you wish to sync.
Securing Your Tablet
Securing your tablet is crucial, and there are specific steps you can take to protect your device and personal information. In this section, we’ll explore how to safeguard your tablet through essential measures such as setting up screen lock and password. We’ll discuss the importance of enabling two-factor authentication for an added layer of security. So, let’s dive in and learn how to keep your tablet safe and secure!
1. Setting up Screen Lock and Password
- Begin by accessing the “Settings” menu on your tablet in order to set up a screen lock and password.
- Once you are in the “Settings” menu, locate and choose the “Security” or “Lock screen” option.
- From the available options, select the type of screen lock that best suits your preferences. You can opt for a pattern, PIN, or password.
- After selecting your desired screen lock, carefully follow the on-screen instructions to create it.
- If additional security options are available, like two-factor authentication or fingerprint recognition, consider customizing them to enhance your tablet’s security.
- Finally, put your newly created screen lock to the test by locking and unlocking your tablet.
By performing these steps, you will successfully set up a screen lock and password for your tablet. This will effectively safeguard your personal information, ensuring its privacy and protection against unauthorized access.
2. Enabling Two-Factor Authentication
- To enable two-factor authentication on your new tablet, follow these steps:
- Go to the Settings menu on your tablet.
- Scroll down and find the Security section.
- Select the option for Two-Factor Authentication.
- Choose your preferred method of authentication, such as receiving a code via SMS or using an authenticator app.
- Follow the on-screen instructions to set up the authentication method.
- Once enabled, you will need to enter both your password and the additional authentication code when logging into your tablet.
Enabling Two-Factor Authentication adds an extra layer of security to your tablet, protecting your personal information. It ensures that even if someone discovers your password, they still won’t be able to access your tablet without the additional authentication code.
Exploring Additional Tablet Features
Unveiling the hidden gems of your new tablet, we dive into the realm of exploring additional features that will take your tablet experience to the next level. Discover the wonders of using the camera and gallery, navigating the home screen and app drawer with ease, and personalizing your widgets and shortcuts for a truly customized setup. Get ready to unlock the full potential of your tablet and make it uniquely yours!
1. Using the Camera and Gallery
- Using the camera and gallery on your tablet can be a fun and convenient way to capture and store your photos. Here are a few steps to get you started:
- Open the camera app on your tablet by locating the camera icon on your home screen or in your app drawer.
- Position your tablet to frame your desired subject in the camera viewfinder.
- Tap the screen to focus on your subject and adjust the exposure if needed.
- Press the capture button to take a photo.
- To access your gallery, locate the gallery app on your home screen or in your app drawer.
- Scroll through your photos to view and organize them.
Pro-tip: Experiment with different camera modes and settings to enhance your photos, such as adjusting the brightness, enabling HDR, or using filters. Practice makes perfect, so don’t be afraid to explore and get creative with your tablet’s camera and gallery features.
2. Navigating the Home Screen and App Drawer
To properly navigate the home screen and app drawer on your new tablet, follow this step-by-step guide:
- Begin by unlocking your tablet and locating the home screen.
- To access the app drawer, simply tap on the app button situated at the bottom-center of the screen or swipe upwards from the bottom.
- Inside the app drawer, you will discover all the apps that are installed on your device. For effortless navigation, swipe left or right to browse through the various pages.
- To launch an app, just tap on its icon. If you wish to organize your apps, you have the option to drag and drop them into different screens or even create folders.
- In order to return to the home screen from an app, you can either press the home button or perform an upward swipe from the bottom of the screen, which will open the app drawer. Then, tap on the home screen.
- If you want to switch between open apps, perform an upward swipe from the bottom of the screen and pause briefly. Afterwards, swipe left or right to navigate through the recent apps and select the one you desire to switch to.
- Personalize your home screen by adding widgets, shortcuts, and changing wallpapers. Simply tap and hold on an empty space on the home screen to access the customization options.
3. Customizing Widgets and Shortcuts
Customizing widgets and shortcuts on your tablet can greatly enhance your user experience and make accessing your favorite apps and features quicker and more convenient. To get started with customizing your home screen, here are some helpful tips:
- Adding widgets: Begin by tapping and holding on your home screen to open the widget menu. From there, you will be able to select and place widgets that display useful information or provide direct access to specific app functions.
- Organizing widgets: You have the flexibility to rearrange widgets by simply dragging them to different positions on your home screen. Additionally, you can resize widgets according to your personal preferences.
- Creating shortcuts: Take advantage of creating shortcuts on your home screen for quick access to frequently used apps or settings. All you need to do is tap and hold on an app or setting icon, and then drag it to the desired location on your home screen.
Let me tell you a true story about a user who customized their tablet. They added a weather widget, a calendar widget, and shortcuts to their favorite social media apps. This simple customization allowed them to stay informed and connected with just a glance at their home screen, saving them valuable time and effort.
Tips for Optimizing Tablet Performance
Unlock the full potential of your new tablet with these crucial tips to optimize its performance. Discover how to effectively manage storage and clear cache to keep your device running smoothly. Stay ahead of the game by learning how to update your operating system and ensure your tablet is secured with the latest security patches.
Get ready to experience improved speed, enhanced features, and a seamless user experience with these essential tablet optimization techniques.
Related Article – How to set up a new Google Android tablet
1. Managing Storage and Clearing Cache
To effectively manage storage and clear cache on your tablet, follow these steps:
- Identify storage usage: Head to Settings and navigate to Storage. Review the space taken by different apps, files, and media.
- Clear cache: Click on Storage, then choose Cached Data. Confirm to clear all cached data, freeing up storage space.
- Manage app storage: In Settings, access Apps or Applications. Select an app and click on Storage. Clear app cache and data for specific apps if necessary.
- Delete unnecessary files: Utilize a file manager app to locate and delete unwanted files, such as downloads, duplicated photos, and videos.
- Move data to SD card: If your tablet supports external storage, transfer files like photos, videos, and music to the SD card to free up internal storage.
- Use cloud storage: Upload files to cloud storage services like Google Drive or Dropbox to optimize storage usage.
By following these steps, you can efficiently manage storage and clear cache on your tablet, ensuring smooth performance and ample storage space.
2. Updating Operating System and Security Patches
To ensure optimal performance and security, it is crucial to regularly update the operating system and security patches on your tablet. Follow these steps:
- Access the Settings on your tablet.
- Scroll down and choose either “System” or “Software Update“.
- Select “Check for Updates” to see if there are any new updates available.
- If an update is available, click on “Download” and allow your tablet to update.
- Once the update is downloaded, your tablet will prompt you to install it. Tap on “Install” and carefully follow the on-screen instructions.
- During the installation process, your tablet may restart. Let it complete the installation.
- After the update is installed, your tablet will be running on the latest version of the operating system and will have the most recent security patches.
Remember that keeping your tablet‘s operating system and security patches updated helps protect your device against potential vulnerabilities and ensures you have access to the latest features and improvements. Stay up to date for a smooth and secure tablet experience.
Facts:
Some Facts About Tutorial: Setting Up Your New Tablet for the First Time:
- ✅ Setting up a new Android tablet requires an internet connection and a Google account. (Source: lifewire)
- ✅ The setup process for a new Android tablet can vary depending on the manufacturer, with some adding custom setup options. (Source: lifewire)
- ✅ Users can choose to copy apps and data from a prior device during the setup process. (Source: lifewire)
- ✅ The initial setup screen allows users to select the default language for their new tablet. (Source: lifewire)
- ✅ Terms and services may be presented during the setup process that users must agree with to use the device. (Source: lifewire)
Frequently Asked Questions
1. How do I set up my new Android tablet for the first time?
To set up your new Android tablet, follow these steps:
- Press the power button to turn on the tablet.
- Choose the default language on the welcome screen.
- Agree to the terms and services, if prompted.
- Select a Wi-Fi network and enter the password if needed.
- Choose whether to copy apps and data from a prior device or not.
- Follow the on-screen instructions to complete the setup process.
2. Can I reset my Android tablet to its factory settings?
Yes, you can reset your Android tablet to its factory settings. Here’s how:
- Go to the Settings menu on your tablet.
- Scroll down and tap on “System” or “System & Updates”.
- Tap on “Reset” or “Reset Options”.
- Select “Factory Reset” or “Erase all data”.
- Confirm the reset and wait for the process to complete.
3. How do I download programs on my Android tablet?
To download programs on your Android tablet, follow these steps:
- Open the Google Play Store app on your tablet.
- Search for the program you want to download.
- Tap on the program’s name to open its page.
- Tap on the “Install” button to start the download.
- Wait for the download and installation process to complete.
4. Can I use a SIM card with my Android tablet?
It depends on your Android tablet model. Some tablets have the ability to support SIM cards, allowing you to use mobile data and make calls. However, not all tablets have this capability. You can check the specifications of your tablet or consult the manufacturer’s documentation to see if it supports a SIM card.
5. How do I move apps on my Android tablet?
To move apps on your Android tablet, follow these steps:
- Go to the home screen of your tablet.
- Look for the app you want to move.
- Long-press on the app icon until a menu appears.
- Drag the app icon to the desired location on the screen.
- Release your finger to drop the app in its new position.
6. How do I open the shortcuts menu on my Android tablet?
To open the shortcuts menu on your Android tablet, follow these steps:
- Go to the home screen of your tablet.
- Look for the grid of dots or the three vertical lines icon.
- Tap on the grid of dots or the three vertical lines icon.
- The shortcuts menu will open, showing you quick access to various features and apps.